
Introduction
Are you a player?
You may want to check out the player guide instead. Only staff members can create quests.
Are you a MassiveCraft staff member?
In such case you are in the right place. This is the MassiveQuest author guide. Here you will learn how to write new quest for our player base. It’s all done using ingame commands.
Are you a server owner or plugin developer?
Sorry, MassiveQuest is closed source. We open sourced Factions, CreativeGates and Vampire but MassiveQuest is however not going to become open source in the foreseeable future. We must keep some plugins to ourselves so we can be unique and not just be yet another minecraft server.
Commands
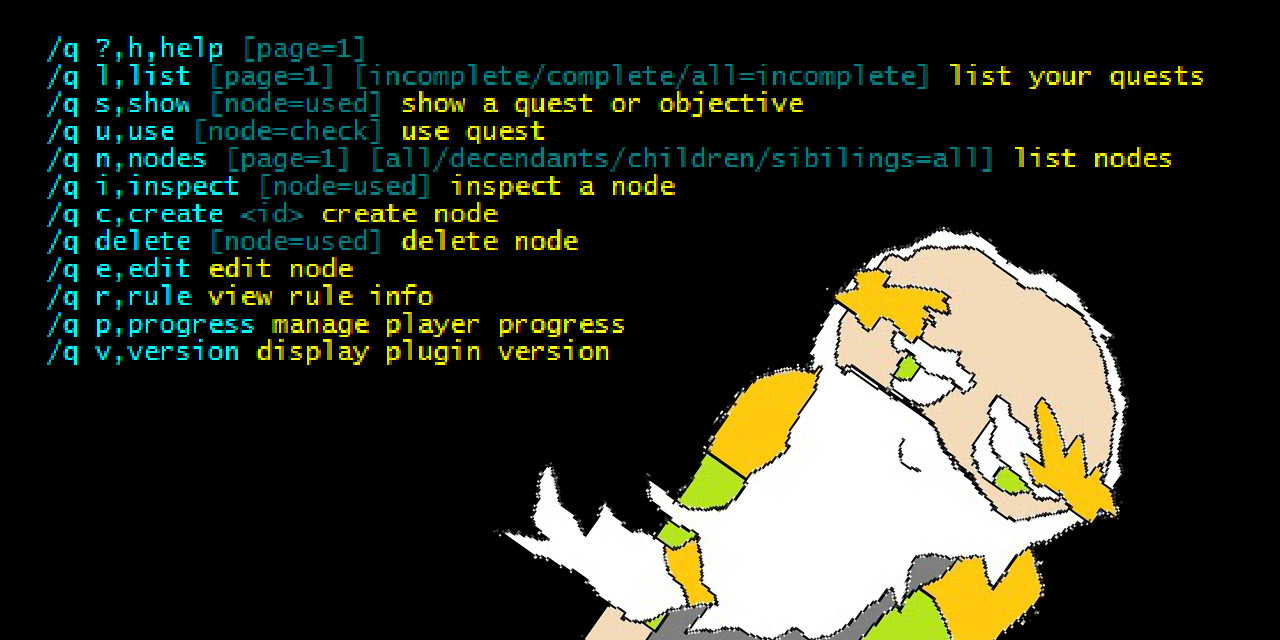
All commands can be found under the /q,quest base command.
Player Commands
- l,list [page=1] [incomplete/complete/all=incomplete] list your quests
- s,show [node=used] show a quest or objective
- u,use [node=check] use a quest
- v,version see plugin version
Author Commands
- n,nodes [page=1] [all/decendants/children/sibilings=all] list nodes
- i,inspect [node=used] inspect a node
- c,create <id> create node
- delete [node=used] delete node
- e,edit
- i,id <id> set new id
- n,name <name> set new name
- d,desc <desc> set new desc
- c,category <category> set new category
- v,visible <visible> set new visible
- t,times <times> set new times
- co,cooldown <cooldown> set new cooldown
- tf,tofind [rule=list] [data] edit tofind
- ta,toadvance [rule=list] [data] edit toadvance
- of,onfind [rule=list] [data] edit onfind
- oa,onadvance [rule=list] [data] edit onadvance
- oc,oncomplete [rule=list] [data] edit oncomplete
- l,locked <locked> edit locked
- r,rule
- l,list [page=1] list rules
- s,show <rule> show rule
- p,progress
- l,list [page=1] [player=you] list found node progress
- f,find [player=you] [node=used] find node
- u,unfind [player=you] [node=used] unfind node
- ut,unfindtree [player=you] [node=used] unfind node and all of it’s decendants
- a,advance [times=1] [player=you] [node=used] advance node progress
- c,complete [player=you] [node=used] advance node progress completely
- s,set <times> [player=you] [node=used] set node progress
- t,tool
- clean remove progress entries for deleted quests
- todo converts all ToFind into DoFind where possible
- ntlcompile compiles all NodeTraversalLanguage into plain node ids
Permissions
- Rank0 (normal players) can’t even see the author commands.
- Rank1 can see all commands and have read only access.
- Rank2 can do everything but lock and unlock nodes.
- Rank3 can lock and unlock nodes.
The Node
What is a “node”? The node is the sole quest building block from a data perspective. These are the fields:
Field Type Edit Command Description Example ID Text /q e i <id> The formal database id. example.talktosteve Name Text /q e n <name> A nice name for humans. Talk to Steve Desc Text /q e d <desc> What’s this quest about? What’s the objective? It’s raining today. Go inside and talk to Steve. He will give you a cake. Category Toggle /q e c <category> Is this node a quest category? false Visible Toggle /q e v <visible> Is this node visible to the quester? true Times Number /q e t <times> How many times must this node be advanced for completion? 1 Cooldown Time /q e co <cooldown> How soon after completion can this node be completed again? 5days1min40seconds ToFind Rule+Data… /q e tf [rule=list] [data] Rules that must apply to find this node. onenterworld regalia
ifrainToAdvance Rule+Data… /q e ta [rule=list] [data] Rules that must apply to advance this node 1 time. onclicknpc Steve
ifinworld regaliaOnFind Rule+Data… /q e of [rule=list] [data] Rules to apply upon finding this node. OnAdvance Rule+Data… /q e oa [rule=list] [data] Rules to apply upon advancing (but not completing) this node. OnComplete Rule+Data… /q e oc [rule=list] [data] Rules to apply upon completing this node. docmd /give {p} cake 1 Locked Toggle /q e l <locked> Is this node locked? Locked nodes and their descendants can’t be edited. true Authors Player… automatically updated What authors have edited this node? Cayorion
MonMartyThe Tree Structure

MassiveQuest looks at the dots in the node id and interprets this as if the nodes were in a tree structure. This is done by looking at the dots in the node id. The node id is always in lowercase letters and has parts separated with dots. For example “example.talktosteve“, “etosil.undead.deforestation” or “test.cayorion.hah.300“. Let’s learn some terminology for tree structures:
- child: The node “asdf.herp.derp” is a child to the node “asdf.herp”. The node “asdf.herp.derp” is however not a child to the node “asdf”.
- parent: The node “asdf.herp” is the parent to the node “asdf.herp.derp”. The node “asdf” is however not the parent to the node “asdf.herp.derp”.
- descendant: Both “asdf.herp” and “asdf.herp.derp” are descendants to the node “asdf”.
- ancestor: “asdf” is an ancestor both “asdf.herp” and “asdf.herp.derp”.
- sibling: “asdf.herp”, “asdf.frood” and “asdf.kakaa” are siblings.
- root: “asdf” is a root node since it contains no dots.
- orphan: A non-root node whose parent do not exist is called an orphan. The node “blipp.blopp” is an orphan if “blipp” does not exist.
NOTE: Don’t create orphans! Make sure to create the required ancestors. The way MassiveQuest is designed orphans make no sense.
A node is either a Category, Quest or Objective. To make a node a category you have to edit the Category Toggle using /q e c true. If a node isn’t a category it’s either a Quest or an Objective. A child to a category node is interpreted as a quest and the rest are interpreted as objectives. Quests and Objectives are pretty much the same thing though. We could have called Objectives Sub-Quests instead.
ID Standards
We have a ID standard for Categories. The root categories (the very top ones) must always be world names. If a quest starts in Etosil it should be put somewhere under the “etosil” category. As for the sub categories we should try to categorize based on a more fine grained location or possibly what “faction” hands out the quest. This is an example proposed category layout for the etosil island where the undead and alive are having a civil war:
- etosil – the root category node for the world Etosil.
- etosil.alive – sub category for helping the alive side in the civil war.
- etosil.alive.tavern – sub category for quests handed out in the city tavern.
- etosil.alive.guard – sub category for quests handed out at the city guard barracks.
- etosil.undead – sub category for helping the undead side in the civil war.
- etosil.undead.manor – sub category for quests handed out at the manor.
- etosil.undead.graveyard – sub category for quests handed out at the graveyard.
We also have an ID standard for Quests and Objectives. Quests are named after some abbreviation or short form of their name. The quest called “The Missing Guardsman” could have id “etosil.alive.guard.tmg”. The Objectives of the Quest are using numbers with multiples of 100 like this:
- etosil.alive.guard.tmg – The Missing Guardsman – Sir Erik left to patrol the western side of the island three days ago, and hasn’t returned.
- etosil.alive.guard.tmg.100 – Search the western side of the island – Since that’s where he said he would go it makes sense to start the search there.
- etosil.alive.guard.tmg.200 – Report back to Officer Robin – Erik was found dead. Bring the sad news to Officer Robin.
Command Basics
/q list VS /q nodes
The player command /q l,list [page=1] [incomplete/complete/all=incomplete]
has the author equivalent /q n,nodes [page=1] [all/decendants/children/sibilings=all]Both those commands list nodes. The player one lists the nodes from the perspective of the player. That means you will see only nodes you found when using /q l. Additionally it will show you your progress. As an author you want to all nodes regardless of whether you found them or not. You also want more technical information. This is what /q n is for.
HINT: Is your node showing up in red color in /q n? That means it’s an orphan. You should create the missing quest categories!
HINT: What does the C D S letters in /q n stand for? Children, Descendants and Siblings./q show VS /q inspect
The player command /q s,show [node=used]
has the author equivalent i,inspect [node=used]Both those commands view info for a certain node. Just like list and nodes; show and inspect will show you the player and author side of the same coin. /q i is your best friend! You will use it a lot when writing quests. When inspecting you will see all the system details for the node.
Node arguments and /q use
Many of the commands take a node argument. It’s usually [node=used]. What does that mean? First of all the square braces “[]” indicates that the argument is optional. If you don’t supply one the node you are currently “using” will be assumed. You can select one node for use at a time. This is done with /q u,use [node=check]. You can use either node id or name meaning both these would work:
- /q u etosil.alive.guard.tmg
- /q u the missing guardsman
And now for an advance feature: relative node id selection. Say you have selected “etosil.alive.guard.tmg” and you want to select the parent “etosil.alive.guard”. You can type “/q u ..” to achieve that. Double dot means the parent node of the currently used node. Say you are using “etosil.alive.guard” and you want to use the child node “etosil.alive.guard.200”. You can type “/q u .200” to achieve that. These features can be used for any command and not only /q u. You want to inspect the parent of your currently selected node? Just go ahead and type “/q i ..“.
Commands for editing
Use /q c,create <id> to create an new node. Upon creating a new node it will automatically be selected for use.
Use /q e i,id <id> to change the id of the selected node. It’s basically a search and replace feature that looks over all MassiveQuest player and node data. For this reason it’s a bit performance heavy and slightly error prone.
Per default the name will be set to the id. That’s boring as hell. Your first order of business is to give the node a proper name using
/q e,edit n,name <name>NOTE: None of the edit commands takes a node argument. They all operate on the currently used node.
Your second order of business is to give the node a description using the /q e,edit d,desc <desc> command. This step is actually optional. Nodes don’t need a description. The output from /q s can at times look cleaner without descriptions on everything. Use /q e d null to remove the current description. Some times you want the opposite though! You want a really long and elaborate description. In those situations it may not fit into the chat input. The solution is to use the MassiveCore variable system. The <br> tag can be used for line breaks like in this example: /q e d paragraph one<br><br>paragraph two.
Use /q e,edit c,category <category> to set the category toggle for the used node. Use either of these:
- /q e c true
- /q e c false
Next up is /q e,edit t,times <times>. The “times” field is a number. It could be 0, 1, 2, 3, 4 etc. Per default it’s 1. The times field decides how many times the node must be advanced in order to be completed. You want the player to have killing 10 zombies as an objective? Set times to 10! You want a node that is completed at once it’s found? Set times to 0! Nodes with times 0 are purely informational nodes. They are commonly placed at the end of a quest to have a nice summary message appear.
Use /q e,edit co,cooldown <cooldown> to set the node cooldown. If you want a 1 day cooldown you should type /q e co 1day. If you want to remove the cooldown you should type /q e co null. Cooldown is usually null. What does the cooldown do? Upon completing a node with cooldown a timer starts and once the timer rings the node and all it’s children are unfound, then the node is found again. Basically all quest progress is erased and you can do the quest again as if you just found it. If you want the quest to be repeatable but without a cooldown you can use /q e co 0.
And now it’s time to bring out them heavy gunz!!! Lets take a look at the rule commands:
- /q e,edit tf,tofind [rule=list] [data]
- /q e,edit ta,toadvance [rule=list] [data]
- /q e,edit of,onfind [rule=list] [data]
- /q e,edit oa,onadvance [rule=list] [data]
- /q e,edit oc,oncomplete [rule=list] [data]
With these commands you manage rules. Say you want the player to find the quest upon clicking an NPC called Officer Robin.
You would type: /q e tf onclicknpc officer robin. Say additionally you must also be a premium member to get the quest when clicking Officer Robin. You would type /q e tf ispremium. Say you forgot what rules you added? Just type /q i to see all info. The current rules would be:- onclicknpc officer robin
- ispremium
You want to delete the ispremium rule? Type /q e tf #2. That will delete the second rule.
Rules
There are three types of rules:
- Triggers – these rules start with “on” like “onclicknpc”
- Requirements – these rules start with “if” like “ifpremium”
- Actions – these rules start with “do” like “doloseitem”
Use /q r,rule l,list [page=1] to list the available rules.
Use /q r,rule s,show <rule> to show more info on a specific rule.
You can also find all the available rules further down on this page.We use the term “apply“. A rule either applies or it does not. Only one trigger can apply at a time. If you click the npc called officer robin the rule “onclicknpc officer robin” would apply during an instant. Multiple requirements can apply at a time. It’s perfectly possible for “ifpremium” and “ifrain” to apply at the same time. They would apply for any premium member standing in a world where it’s raining. Actions always apply. It’s 100% impossible for a rule to not apply. An action will try to carry itself out and it’s the attempt that counts. In rare cases actions might fail somehow but we don’t give a shit. They apply anyways.
Multiple rules together form what we call a “rule set“. The files tofind, toadvance, onfind, onadvance and oncomplete are all rule sets. A rule set applies if and only if all rules within applies. Another way to describe this is that the rules are connected with AND operators. There is no OR functionality within a rule set.
Example: The ruleset [“onclicknpc officer robin”, “onclickblock”] can never apply since only one trigger can apply at the same time. It’s impossible to both click an npc and a click a block in the very same atomic time instance. You can first click an npc and then very shortly after click a block but that is not the same thing as doing it at the same time.
Example: The ruleset [“docmd /give {p} 1 cake”, “doloseitem 17×20”] will always apply since it only contains actions. Uppon trying to apply this ruleset for a player the player would get a cake and lose 20 logs.
Example: The ruleset [“onclicknpc officer robin”, “ifpremium”, “ifhasitem 17×20”, “doloseitem 17×20”] will apply if
the player is clicking an npc called officer robin AND
the player is premium AND
has 20 logs in their inventory AND
20 logs get removed from their inventory (this will always succeed since it’s an action)The rulesets tofind and toadvance should usually contain one trigger each. The rulesets onfind, onadvance and oncomplete are fired when the node is found, advanced or completed. Those rulesets should not contain any triggers but rather actions and perhaps a few requirements.
If you want a rule to apply when it doesn’t you can prefix it with “!”. The rule “!ifrain” will apply when it’s not raining.
Node Advancement

A player…
- … can only find nodes that she have not found yet.
- … can only advance nodes that she have found and not completed yet.
- … will complete a node when it’s advanced as many times as it has “times”.
Node Traversal Language
MassiveQuest comes with a node traversal language that can be used any time you supply a node as a command argument. It can for example be used in the /q use <node> command (where the origin is your currently used node) or in combination with an OnFind rule (where the origin is the node you add the rule to).
These are the operators:
- . Self
- > First Child
- < Parent (takes times modifier)
- << Root
- + Next Sibling (takes times modifier)
- ++ Last Sibling
- – Previous Sibling (takes times modifier)
- — First Sibling
See the example quest below for usage examples.
Example Quests
Perhaps these example quests will help you understand :)
We assume that the parent categories “etosil”, “etosil.alive” and “etosil.alive.guard” are already created.The Missing Guardsman
Let’s take a look at the command sequence to create the quest “The Missing Guardsman“. This quest starts at the NPC Officer Robin who is standing at the guard barracks. He will ask you to search for the missing guardsman on the western side of the island. The sad truth is that he is dead and when you find his corpse you report the sad new back to officer robin.
12345/q create etosil.alive.guard.tmg/q e n The Missing Guardsman/q e d Sir Erik left to patrol the western side of the island three days ago, and hasn't returned./q e tf OnClickNpc Officer Robin/q e of DoFind etosil.alive.guard.tmg.10012345/q create etosil.alive.guard.tmg.100/q e n Search the western side of the island/q e d Since that's where he said he would go it makes sense to start the search there./q e ta OnEnterRegion etosil.guardcorpse/q e oc DoFind etosil.alive.guard.tmg.20012345/q create etosil.alive.guard.tmg.200/q e n Report back to Officer Robin/q e d Erik was found dead. Bring the sad news to Officer Robin./q e ta OnClickNpc Officer Robin/q e oc DoAdvance etosil.alive.guard.tmgThis is a simple quest in the sense that we only used trigger-rules. The “OnEnterRegion etosil.guardcorpse” assumes that we have set up WorldGuard region around the corpse. Did you understand what the last two commands are for? We advance/complete the quest itself when we complete the last objective in the quest. Similarly we find the first quest objective when we find the quest itself.
The Missing Guardsman (with NTL)
This is the missing guardsman quest again. This time however we make use of the node traversal language.
12345/q create etosil.alive.guard.tmg/q e n The Missing Guardsman/q e d Sir Erik left to patrol the western side of the island three days ago, and hasn't returned./q e tf OnClickNpc Officer Robin/q e of DoFind >12345/q create etosil.alive.guard.tmg.100/q e n Search the western side of the island/q e d Since that's where he said he would go it makes sense to start the search there./q e ta OnEnterRegion etosil.guardcorpse/q e oc DoFind +12345/q create etosil.alive.guard.tmg.200/q e n Report back to Officer Robin/q e d Erik was found dead. Bring the sad news to Officer Robin./q e ta OnClickNpc Officer Robin/q e oc DoAdvance <The following node traversal language was used:
- > to match the first child node (for finding the first objective upon finding the quest itself).
- + to match the next node (for finding the next node upon completing the previous one).
- < to match the parent node (the advancing/completing the quest itself upon completing the last objective).
Defend the Gates
Let’s take a look at the command sequence to create the quest “Defend the Gates“. You get this quest when you finish “The Missing Guardsman“. The undead are attacking the city gates. You are to go there and slay some zombies and skeletons. Additionally you must deliver some bones to NPC Officer Robin to get your contribution approved.
12345/q create etosil.alive.guard.dtg/q e n Defend the Gates/q e d We are under siege! The undead are attacking the city gates. Help us protect the city!/q e tf OnComplete etosil.alive.guard.tmg/q e oc DoFind >123456/q create etosil.alive.guard.dtg.100/q e n Walk to the Gates/q e d The city gates are at the north east part of the city/q e ta OnEnterRegion etosil.gates/q e oc DoFind <.200/q e oc DoFind <.30012345/q create etosil.alive.guard.dtg.200/q e n Kill Zombies/q e t 10/q e ta OnKillMob zombie/q e ta IfInRegion etosil.gates123456789101112131415/q create etosil.alive.guard.dtg.300/q e n Kill Skeletons/q e t 10/q e ta OnKillMob skeleton/q e ta IfInRegion etosil.gates/q create etosil.alive.guard.dtg.400/q e n Bring 5 bones to Officer Robin/q e d Prove you helped by bringing 5 bones to Officer Robin./q e tf IfCompleted -1/q e tf IfCompleted -2/q e ta OnClickNpc Officer Robin/q e ta IfHasItem 352x5/q e oc DoLoseItem 352x5/q e oc DoAdvance <This quest was more advanced. You get both of the objectives “Kill Zombies” and “Kill Skeletons” at the same time upon arriving at the city gates. Both of these make use of the “times” field to denote that you need to kill 10 zombies instead of just only one. To get the final objective you must have complete both “Kill Zombies” and “Kill Skeletons”. This is done by using the the IfCompleted rule two times. Note that we did not use OnComplete rules. Having two triggers is as previously mentioned not allowed but having two requirements is fine. Note that you should use OnComplete where possible. To finish the last objective you need to click Officer Robin while carrying 5 bones. Upon completing the last node you will lose 5 bones.
The following node traversal language was used:
- > to match the first child node (for finding the first objective upon finding the quest itself).
- <.200 to match the sibling node ending with .200 (to get the two objectives).
- <.300 to match the sibling node ending with .300 (to get the two objectives).
- -1 to match the previous node (an objective).
- -2 to match the second previous node (an objective).
- < to match the parent node (the advancing/completing the quest itself upon completing the last objective).
Trigger Rules
OnBreakBlock
Triggers when player left- or right-clicks a matching block.
Data: <material:data>
You can use “*” or to match any value. Material must be supplied. Data defaults to *. “17” or “17:*” would match any kind of log. “17:2” would match birch log. “*:3” would match blocks of any material and with data 3… although I have no idea why you would want to do this.
OnChat
Triggers when player types the string in the chat box. Start with “/” to detect command usage.
Data: <string>
With string we mean a line of text. In this case the string is converted to lowercase (case INsensitive).
OnClickBlock
Triggers when player clicks a matching block.
Data: <material:data>
You can use “*” or to match any value. Material must be supplied. Data defaults to *. “17” or “17:*” would match any kind of log. “17:2” would match birch log. “*:3” would match blocks of any material and with data 3… although I have no idea why you would want to do this.
OnClickFrame
Triggers when player clicks an item frame with matching content.
Data: <material:data>
You can use “*” or to match any value. Material must be supplied. Data defaults to *. “17” or “17:*” would match any kind of log. “17:2” would match birch log. “*:3” would match blocks of any material and with data 3… although I have no idea why you would want to do this.
OnClickMassiveMob
Triggers when player rightclicks an instance of the specified MassiveMob.
Data: <massivemob>
Specify the MassiveMob by name. The actual id of the MassiveMob will be stored. This means the rule will work fine even if you later decide to rename the MassiveMob.
OnClickNpc
Triggers when player rightclicks an NPC with the specified name.
Data: <npc>
Specify the NPC name. Any NPC with a matching name counts. The matcher is color and case in-sensitive. Since any NPC with a matching name counts you may want to combine this rule with another rule, for example IfInWorld.
OnClickSign
Triggers when the player clicks a [Quest] sign with the specified text.
Data: <quest sign text>
Quest signs are wall signs and sign post blocks. They can be created by writing “quest” on the first line. The quest sign text is counted as what’s on the last three lines. When comparing sign text these three lines are processed as follows:
- Line breaks are converted to a space.
- All color codes are removed.
- Everything is converted to lower case.
- Multiple spaces replaced with one space.
- Leading and trailing spaces are removed.
OnComplete
Triggers when player completes the specified node.
Data: <node>
You can use either node id or node name. It does not matter which you use. The node id is what will be stored.
OnConsume
Triggers when player consumes a matching item.
Data: <material:data>
You can use “*” or to match any value. Material must be supplied. Data defaults to *. “17” or “17:*” would match any kind of log. “17:2” would match birch log. “*:3” would match blocks of any material and with data 3… although I have no idea why you would want to do this.
OnCraft
Triggers when player crafts a matching item stack. Crafting types covered are Workbench, Furnace and Brewing Stand.
Data: <material:dataxcount>
You can use “*” or to match any value. Material must be supplied. Data defaults to *. Count defaults to 1. “17:*x3” or “17×3” would for example match three logs of any kind.
OnEnterRegion
Triggers when player enter the specified region.
Data: <world.region>
As an example “herp.derp” would target the world herp and the region derp. Oh and by region we mean WorldGuard region.
OnEnterWorld
Triggers when player enter the specified world. Use * to detect changing to any world or joining the server.
Data: <world>
OnExitRegion
Triggers when player exits the specified world.
Data: <world.region>
As an example “herp.derp” would target the world herp and the region derp. Oh and by region we mean WorldGuard region.
OnFind
Triggers when player finds the specified node.
Data: <node>
You can use either node id or node name. It does not matter which you use. The node id is what will be stored.
OnFirstJoin
Triggers when a brand new player joins the server for the first time. Great for handing out starter kits etc.
Data: no data
OnFishFish
Triggers when player fishes up a matching item stack.
Data: <material:data>
You can use “*” or to match any value. Material must be supplied. Data defaults to *. “17” or “17:*” would match any kind of log. “17:2” would match birch log. “*:3” would match blocks of any material and with data 3… although I have no idea why you would want to do this.
OnGankMassiveMob
Triggers when player kills an instance of the specified MassiveMob. All players that contributed damage are counted.
Data: <massivemob>
Specify the MassiveMob by name. The actual id of the MassiveMob will be stored. This means the rule will work fine even if you later decide to rename the MassiveMob.
OnGankMob
Triggers when player kills an entity of the specified type. All players that contributed damage are counted.
Data: <entity type>
OnGankNpc
Triggers when player kills an NPC with the specified name. All players that contributed damage are counted.
Data: <npc>
Specify the NPC name. Any NPC with a matching name counts. The matcher is color and case in-sensitive. Since any NPC with a matching name counts you may want to combine this rule with another rule, for example IfInWorld.
OnImpactMassiveMob
Triggers when a projectile launched by player impacts on the specified MassiveMob.
Data: <massivemob>
Specify the MassiveMob by name. The actual id of the MassiveMob will be stored. This means the rule will work fine even if you later decide to rename the MassiveMob.
OnImpactMob
Triggers when a projectile launched by player impacts on the specified mob.
Data: <entity type>
OnImpactNpc
Triggers when a projectile launched by player impacts on the specified NPC.
Data: <npc>
Specify the NPC name. Any NPC with a matching name counts. The matcher is color and case in-sensitive. Since any NPC with a matching name counts you may want to combine this rule with another rule, for example IfInWorld.
OnImpactRegion
Triggers when a projectile launched by player impacts in the specified region.
Data: <world.region>
As an example “herp.derp” would target the world herp and the region derp. Oh and by region we mean WorldGuard region.
OnKillMassiveMob
Triggers when player kills an instance of the specified MassiveMob. Only the player dealing the finishing blow is counted.
Data: <massivemob>
Specify the MassiveMob by name. The actual id of the MassiveMob will be stored. This means the rule will work fine even if you later decide to rename the MassiveMob.
OnKillMob
Triggers when player kills an entity of the specified type. Only the player dealing the finishing blow is counted.
Data: <entity type>
OnKillNpc
Triggers when player kills an NPC with the specified name. Only the player dealing the finishing blow is counted.
Data: <npc>
Specify the NPC name. Any NPC with a matching name counts. The matcher is color and case in-sensitive. Since any NPC with a matching name counts you may want to combine this rule with another rule, for example IfInWorld.
Requirement Rules
IfCompleted
Player must have completed the specified node.
Data: <node>
You can use either node id or node name. It does not matter which you use. The node id is what will be stored.
IfFound
Player must have found the specified node.
Data: <node>
You can use either node id or node name. It does not matter which you use. The node id is what will be stored.
IfHaveItem
The player must have the item specified.
Data: <material:dataxcount>
You can use “*” or to match any value. Material must be supplied. Data defaults to *. Count defaults to 1. “17:*x3” or “17×3” would for example match three logs of any kind.
IfHaveMoney
Player must have at least this much money. Otherwise a message telling the player to obtain more money will be sent.
Data: <integer>
An integer is a number like 1 or 2 or 3 or 77378.
IfHavePerm
The player must have the permission specified.
Data: <permission>
With permission we mean a properly registered bukkit api permission node.
IfInRegion
The player must be standing in the specified region.
Data: <world.region>
As an example “herp.derp” would target the world herp and the region derp. Oh and by region we mean WorldGuard region.
IfInWorld
The player must be standing in the world specified.
Data: <world>
IfPremium
The player must be premium.
IfSlotsEmpty
Player must have this many empty inventory slots. Otherwise message telling the player to free up some inventory space will be sent.
Data: <integer>
An integer is a number like 1 or 2 or 3 or 77378.
IfTester
The player must be an approved quest tester.
IfVampire
The player must be vampire.
Action Rules
DoAdvance
Advance this node for the player.
Data: <node>
You can use either node id or node name. It does not matter which you use. The node id is what will be stored.
DoAdvanceRandomChild
Advance a random child of this node for the player. Randomization includes found but uncompleted nodes only and is equally weighted.
Data: <node>
You can use either node id or node name. It does not matter which you use. The node id is what will be stored.
DoCmd
Run the specified console command.
Data: <cmd>
Do include the leading slash. “{p}” will be replaced with the player name.
DoComplete
Complete this node for the player.
Data: <node>
You can use either node id or node name. It does not matter which you use. The node id is what will be stored.
DoCompleteRandomChild
Complete a random child of this node for the player. Randomization includes uncompleted nodes only and is equally weighted.
Data: <node>
You can use either node id or node name. It does not matter which you use. The node id is what will be stored.
DoFind
Find this node for the player.
Data: <node>
You can use either node id or node name. It does not matter which you use. The node id is what will be stored.
DoFindRandomChild
Find a random child of this node for the player. Randomization includes unfound nodes only and is equally weighted.
Data: <node>
You can use either node id or node name. It does not matter which you use. The node id is what will be stored.
DoGiveItem
Executes DoCmd /give {p} …
Data: <string>
With string we mean a line of text.
DoGiveMoney
Give this amount of money to the player.
Data: <integer>
An integer is a number like 1 or 2 or 3 or 77378.
DoHearSound
Executes DoCmd /sudo {p} /massivecore hearsound …
Data: <string>
With string we mean a line of text.
DoLoseItem
Attempt to remove the specified item from the player.
Data: <material:dataxcount>
You can use “*” or to match any value. Material must be supplied. Data defaults to *. Count defaults to 1. “17:*x3” or “17×3” would for example match three logs of any kind.
DoLoseMoney
Remove this amount of money (or as much as possible) from the player.
Data: <integer>
An integer is a number like 1 or 2 or 3 or 77378.
DoRestoreChunk
Restore this chunk using MassiveRestore..
Data: <destination>
Specify the destination as you would for the command /tp <destination>. The player will have permission to all possible destinations. The destination is resolved into a chunk.
DoTeleport
Teleport the player to this destination.
Data: <destination>
Specify the destination as you would for the command /tp <destination>. The player will execute this command but have permission to all possible destinations.
DoUnfind
Unfind this node for the player.
Data: <node>
You can use either node id or node name. It does not matter which you use. The node id is what will be stored.
DoFindRandomChild
Unfind a random child of this node for the player. Randomization includes found nodes only and is equally weighted.
Data: <node>
You can use either node id or node name. It does not matter which you use. The node id is what will be stored.

