Table of Contents
Each Iron, Gold, and Diamond block affects mob spawns within a 13x13x7 zone centered on the placed block. The first Diamond block gives a darkroom boost of 5, the first Gold block gives a darkroom boost of 3, and the first Iron block gives a boost of 2. Each subsequent block of the same type gives 5% less of a boost than the previous block.
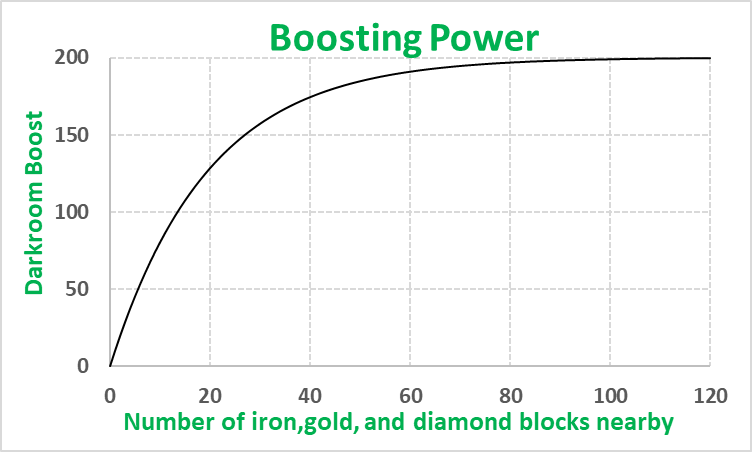
The total boost per every 1 diamond,gold, and iron block nearby is given in the chart below, where darkroom boosting is maxed at 200. For reference, 1 full layer of equally divided diamond,iron, and gold blocks in a floor corresponds to 85 of each type placed (and an average boosting power of 197.5)
At darkroom boost of 40, yellow mobs begin to appear. The frequency of yellow mobs doubles at 80, triples at 120, all the way up to x5 spawn rate at 200.
At darkroom boost of 160, pink mobs begin to appear. The frequency of pink mobs doubles at 168, triples at 176, all the way up to 6x spawn rate at 200.
At darkroom boost of 195, red mobs begin to appear. The frequency of red mobs is 4x at 196, 8x at 197, all the way up to 20x at 200.
Additionally, the darkroom boost can also spawn diamond miner mobs which drop 3-7 diamonds on death.
Finally, you can get notifications for mobs spawned through darkroom boosting as well as easily identifiable particle effects on them by either holding an amethyst shard in your offhand, or having 32+ in your inventory.